The Outlast Trials Story Explained & Walkthrough
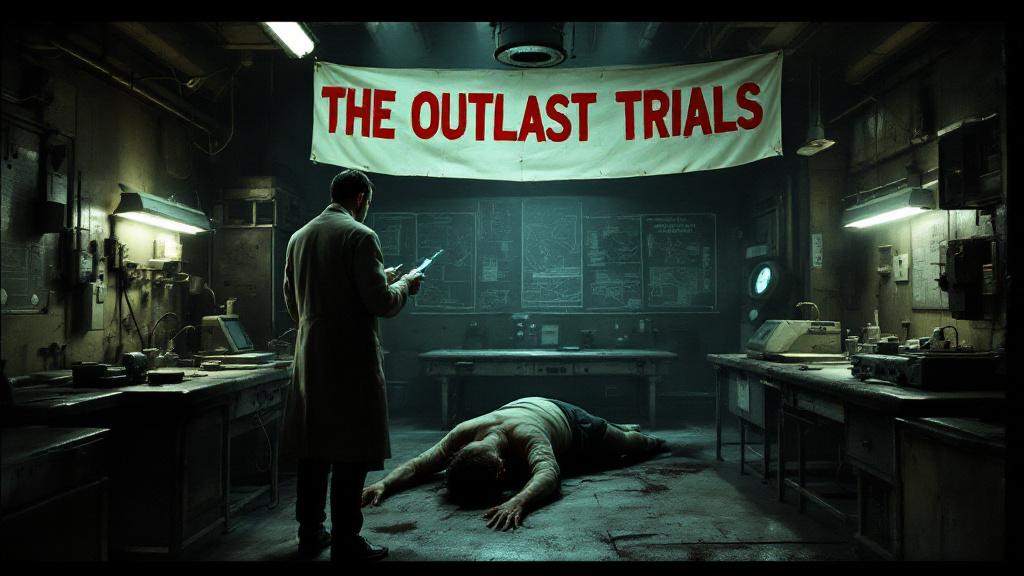
The Outlast Trials is a prequel to the original Outlast game, set during the Cold War era (late 1950s–early 1960s). It tells the horrific origin of the Murkoff Corporation’s mind control experiments.
Setting & Premise
Time: Cold War period
Place: A secret Murkoff facility in the United States
Context: The Murkoff Corporation seeks to create psychological weapons by breaking and reprogramming human minds. Their aim is to create perfect agents, obedient, emotionless, and controllable.
The Reagent Program
You play as a Reagent, a civilian kidnapped and forced into Murkoff’s sadistic trials.
Your identity is stripped. You undergo brainwashing, hallucination-inducing drugs, and behavioral reconditioning. The facility is disguised as ordinary locations (police stations, orphanages, amusement parks) to simulate real-world trauma scenarios.
Goal of the Trials
Murkoff uses:
Psychological warfare, Sleep deprivation, Torture & hallucinations and to destroy your free will. Each trial is designed to make you:
- Betray others
- Obey without question
- React with fear and violence
Their end goal: break you down and rebuild you into a “productive citizen”, a weaponized sleeper agent.
👉 Play Outlast on PS4:
Characters & Factions
Reagents: The test subjects (you and others).
Murkoff Personnel: Cold, clinical researchers and monitors.
Programmed NPCs (Enemies): Psychotic killers like Mother Gooseberry, Father Luthor, and The Snitch, who embody themes of religious manipulation, authoritarianism, and control.
Endgame (Spoiler-Free)
Without spoiling details:
You progress through increasingly difficult trials. You must decide whether to maintain your humanity or succumb to Murkoff’s reprogramming. There are hints that your survival or obedience may shape your fate in Murkoff’s long-term plans, connecting to the future horrors seen in Outlast 1 and Outlast 2.
Connection to Outlast Universe
Introduces how Murkoff began its MK-Ultra-like experiments. Lays the groundwork for the unethical science and corruption seen in the main Outlast titles.
The experimentation in The Outlast Trials mirrors the documents and lore revealed in Mount Massive Asylum (Outlast 1).
Play Outlast now on Xbox from the link below
Is The Outlast Trials Worth Buying in 2026
If you are asking this question in 2026, you are looking at a fundamentally different beast than the Early Access experiment we saw years ago.
We are now deep into the game’s lifecycle, post-Season 5, with Season 6 looming on the Spring horizon and Red Barrels has successfully transitioned this from a simple co-op jumper into a genuinely complex live service of horror.
For a content creator or a solo player, the value proposition has shifted dramatically.
In 2024, the game was about surviving AI; in 2026, with the introduction of the Invasion mechanics and the “Impostor” system added late last year, the game has evolved into a psychological playground that rivals the social tension of Among Us but wrapped in the visceral, gore-slicked aesthetic of the Saw franchise.
It is no longer just about running from Mother Gooseberry; it is about questioning the reality of your own teammates, which adds a layer of paranoia that fits perfectly with the franchise’s MKUltra-inspired lore.
For someone like you who appreciates the psychological layering in media like Dark or The Sopranos, the narrative evolution here is subtle but brilliant.
The game has moved beyond simple jump scares into “gaslighting as a mechanic.”
The Rebirth 2.0 system and the expanded lore documents found in the Sinyala Facility now paint a much more cohesive picture of Murkoff’s indoctrination process. It isn’t just random violence anymore; it feels like a structured descent into madness.
Solo play, which was previously a punishingly unbalanced afterthought, has been refined significantly. You can absolutely play this alone now without feeling like the math is rigged against you.
The enemy AI in 2026 has been tweaked to respect line-of-sight and noise discipline more realistically, meaning a stealthy solo run feels like a tense immersive sim, think Hitman but with more severed limbs rather than a frustrating trial of trial-and-error.
From a technical standpoint, if you are rocking something like that RTX 4070 Super we discussed, this game is a visual masterpiece at 1440p. Red Barrels has optimized the Unreal Engine implementation to a point where the lighting, crucial in a game where darkness is a mechanic is suffocatingly realistic.
The ray-traced shadows and global illumination (if you crank settings) make the newer maps, particularly the “Toy Factory” and the updated “Docks,” feel claustrophobic in a way that flat rasterization just can’t convey.
You aren’t just looking at a dark corner; you are looking into a void that feels heavy. It runs silky smooth, meaning if you are recording or streaming content, you won’t be fighting frame drops during the chaotic, particle-heavy moments when the Skinner Man hallucinogenic gas kicks in.
However, the “worth it” verdict comes with a caveat regarding the community. While the player base is stable thanks to cross-play and the constant stream of “Geister” events, the skill floor has risen. Jumping into a random lobby in 2026 can be intimidating because the “meta” for completing trials efficiently is well-established.
If you are playing for content or immersion, this “speedrun mentality” of random players might ruin the atmosphere. But if you have a reliable duo or enjoy the challenge of the solo “Lone Wolf” variators, The Outlast Trials in 2026 offers one of the most high-fidelity, psychologically stressing horror loops on the market. It is no longer a trend; it is a staple.
Trials and Locations Explained
Main Objective: Kill the snitch before time runs out
The Snitch is a restrained NPC who has betrayed Murkoff. Your task is to escort him through the station and ultimately electrocute him in the execution chamber , all while avoiding enemies, solving puzzles, and surviving Murkoff’s chaos.
Find the Snitch
Search early rooms in the station until you find the snitch strapped to a gurney. He’s locked in place and must be moved via gurney rails.
Escort the Snitch
- Push the snitch through multiple station wings:
- Holding Cells
- Evidence Room
- Interrogation Chambers
- Courtroom
- Along the way, you’ll face:
- Locked doors requiring fuse puzzles
- Blocked paths needing generator activation
- Enemies patrolling (such as The Warden, Police Brutes, or Mother Gooseberry in higher difficulty)
Avoid or Disable Enemies
Hide in lockers, under desks, or distract enemies with thrown bottles. Use night vision (but batteries are limited).
Enemies are fast and deadly , stealth is often the best option.
Final Phase , Execution Room
Guide the gurney onto the electric chair platform. Find and insert three fuses into the execution panel.
Activate the chair to electrocute the snitch, completing the trial.
The Orphanage
The Orphanage is Murkoff’s psychological simulation of a twisted place of “care” where innocence is corrupted and faith is weaponized. Reagents are forced into the role of caretakers and spiritual guides, but under Murkoff’s rules, that means punishing children, mutilating religious icons, and cleansing souls through violence.
You face a series of missions framed as divine tasks, but they are in fact brutal conditioning methods. Murkoff’s goal? To rewire your moral compass and strip away compassion, one traumatizing act at a time.
Trial 1: Cleanse the Orphans
Objective:
Cleanse the orphanage of sin by activating the saw and cutting off Jesus’ legs.
Steps:
- Navigate through dark classrooms and dormitories.
- Solve fuse puzzles while avoiding enemies.
- Collect the saw handle and power source.
- Activate the mutilation device at the altar.
- Cut the legs off the crucified Jesus statue.
Secret Tip:
There’s often a healing item hidden behind the stage curtains near the statue room.
Speedrun Tip:
Trigger both saw components before grabbing the final fuse to line up the animation with the power event and save 15 seconds.
Trial 2: Feed the Orphans
Objective:
As caretaker, force-feed or poison the orphans.
Steps:
- Sneak through the kitchen and collect food or poison.
- Interact with each orphan NPC (in cribs, chairs, or crawling).
- Choose to either feed or poison them.
- Avoid or neutralize the patrolling enemy (often Gooseberry).
Secret Tip:
You can poison every orphan for a hidden badge reward. Look for vent openings in the cafeteria ceiling—shortcut routes!
Speedrun Tip:
Don’t hesitate. Poison all orphans to bypass the branching dialogue delays from “feeding” logic.
Trial 3: Gather the Children of God (MK Challenge)
Objective:
Gather the children and prepare them for “ascension.”
Steps:
- Find and escort 3 mannequins (“children”) to the altar.
- Unlock each room with a unique key found in side wings.
- Avoid detection from possessed-looking civilians and stealth traps.
- Activate the final ritual by placing all mannequins in the pews.
Secret Tip:
Behind the chapel podium, there’s sometimes a hidden document with lore about the preacher’s role.
⚡ Speedrun Tip:
Use teammate coordination to grab all 3 mannequins at once—two carry, one distracts.
Trial 4: Reunite the Family (MK Challenge – Winter Kills)
Objective:
Stage a broken family reunion using mannequins.
Steps:
- Locate the “Mother,” “Father,” and “Child” mannequins.
- Reassemble them in the dining room for the final “meal.”
- Solve mini-puzzles to unlock each family member (like wire-cutting or fuse puzzles).
- Trigger the reunion and survive the purification flames.
Secret Tip:
Hidden tape recorders in the side rooms reveal lore about a failed adoption and preacher indoctrination.
Speedrun Tip:
Pre-activate fuse boxes with teammates while another grabs mannequins, this avoids retracing your steps.
Hidden Lore & Secrets Across the Orphanage
| Location | Secret Item | Lore/Effect |
|---|---|---|
| Dormitory vent | Audio log | “The children see the truth in suffering.” |
| Confession booth | Hidden document | Notes on Murkoff’s experiments in spiritual guilt |
| Cafeteria freezer | “Broken pacifier” trinket | Collectible unlocks trial skin |
| Storage locker (hall) | Badge stash | Earns “Sin Collector” badge |
General Speedrun Tips for Orphanage Trials
- Always pick up batteries early, night vision helps you avoid random patrols.
- In co-op, assign one player to fuse hunting and another to NPC objective interaction.
- Memorize map layouts, the Orphanage reuses room structures in multiple trials.
- Don’t engage with distractions unless scripted, many noises are Murkoff illusions.
Outlast Trials Fun Park
The Fun Park is not designed for joyrides and cotton candy. It’s a meticulously crafted psychological weapon. Murkoff’s goal here is to systematically dismantle a Reagent’s core beliefs and identity. By forcing you to participate in perverse carnival games and commit acts that attack societal taboos—specifically, the concept of harming children, they aim to purge you of your morals.
The ringmaster of this circus is Mother Gooseberry, a demented puppeteer who sees the animatronic “children” as her own. She will be your primary tormentor, her deranged nursery rhymes echoing through the park as she hunts you down for daring to harm her “b
“Condition the mind to seek safety in the familiar, then twist the familiar into terror.”
Walkthrough: “Grind the Bad Apples”
This is the main trial within the Fun Park. Your objective is to gather a cart of animatronic children and deliver them to a giant grinder for “punishment.”
1. Infiltrate the Fun Park and Reach the Root Canal Ride: Your trial begins at the park’s entrance. Your first task is to navigate the maze-like fairground and find the “Root Canal” ride. Follow the park signs and maps scattered around to guide your way. Be wary, as Ex-Pops begin to patrol the area almost immediately. Your path will eventually lead you to a room with floating hearts in cooking pots and a closed gate. To open it, you must throw a heart at the target above the gate.
2. Get Tickets for the Ride: Once you’re through the gate, you’ll find the entrance to the Root Canal ride is blocked by a ticket inspector mannequin. You need to acquire three tickets by winning three different carnival games that will power up nearby.
Collect Hearts: The hearts you need to play the games are all located in the kitchen area opposite the ticket booth. It’s wise to drop your current inventory items in a safe spot and load up on hearts to minimize backtracking.
Win the Games: Take the hearts to the activated carnival stalls. Each game requires you to hit three targets. Once you succeed, a door at the back of the stall will open, allowing you to collect a ticket.
Exchange Tickets: After collecting all three tickets, return to the mannequin and exchange them to open the ride.
3. Push the Cart of “Children”: Inside the ride, you’ll have a brief, unsettling encounter with Mother Gooseberry. Afterward, a cart filled with animatronic children will appear. Your objective is to push this cart along the ride’s track toward the grinder.
4. Remove Obstacles: The path is not clear. You will encounter two major barricades blocking the track. To remove them, you must follow the blue wires leading from each barrier to a power device on a wall. Disarm these devices to clear the path.
5. Restore Water Flow (The Valve Puzzle): Further along the track, the water powering the ride will drain, halting your progress. You must find and activate four pumps to get the water flowing again.
Follow the pipes leading from the wall in the tunnel. At the end of each correct pipe is a valve you must turn.
Turning the wrong valve will damage your sanity. The area is dark and heavily patrolled, so try to memorize landmarks to find your way back if you’re forced to flee.
6. Grind the Bad Apples: Once the water is restored, you can push the cart to the end of the line: a massive grinder. You must hold the cart against the grinder until all the mannequins are destroyed. This is a dangerous phase, as Mother Gooseberry and other enemies will be relentlessly attacking.
After the last mannequin is destroyed, the grinder itself will open, revealing a shortcut back to the start of the ride. Run back through the fairground to the shuttle and make your escape.
Secrets and Collectibles
The “Confidential” Room: The Fun Park contains a secret room filled with high-tier supplies like boosters and a Master Key. To open the “Confidential” door, you and a teammate must press two blue buttons simultaneously (or within a very short time limit if playing solo).
Known spawn locations for the secret room in the Fun Park are:
Root Canal: In a dark room just behind the first obstacle.
Root Canal: Underneath the main stairs.
Evidence Files: Keep an eye out for collectible documents scattered throughout the park. These files provide more insight into Murkoff’s twisted experiments and the world of The Outlast Trials. Their locations are randomized in each playthrough.
Speedrun Strategies
Want to get the best grade? Shaving off seconds is key.
Know the Map: The fastest runs come from knowing the Fun Park’s layout by heart. Learn the quickest routes and the possible locations for the carnival games and valves.
Divide and Conquer (Co-op): Don’t stick together. Assign tasks. Have one player grab hearts while others locate the active games. During the valve puzzle, have one player trace the pipes while others distract enemies.
Heart Management: To win the carnival games quickly, drop your inventory and carry only hearts. This prevents multiple trips back to the kitchen and reduces your exposure to enemies.
The Grinder Finale: This is the most dangerous part. The most effective strategy is to have one player kite Mother Gooseberry and any other enemies, drawing them away from the grinder. This leaves the other players free to push the cart without being interrupted.
Optimal Loadout: The Stun Rig is invaluable for creating escape opportunities. Amps like Smash help you burst through barricaded doors, saving precious time.
Outlast Trials Courthouse
The “Courthouse” trial is a twisted indoctrination into Murkoff’s view of justice. As a Reagent, you are tasked with destroying evidence, eliminating witnesses, and ultimately, executing a judge. This trial is designed to break down your moral compass and remold you into an obedient asset who will protect the Murkoff Corporation at any cost, even if it means subverting the very foundations of law and order. The primary antagonist you’ll face here is Officer Coyle, a corrupt and brutal police officer who embodies this perverted sense of justice.
Walkthrough: “Vindicate the Guilty”
This trial has a series of objectives that must be completed in order. Be prepared for a frantic and dangerous experience.
1. Infiltrate the Courthouse and Reach the Main Courtroom: Your first task is to simply make your way into the courthouse. You’ll encounter a locked gate, forcing you to find an alternate route through the library. Once you’re through the library, you’ll enter the main courtroom and press a button to trigger a cutscene, officially starting the trial.
2. Unlock and Destroy the Evidence: To the right of the judge’s desk, you’ll find a room with an evidence box. Interacting with it will reveal a UV light puzzle. The solution is a code presented as a triangle order puzzle. Solving this will open the box, revealing a decapitated head.
You must carry this head to a nearby fountain. Dropping it in will trigger the next step: finding and pouring acid to destroy the evidence. A gate will open, leading you to a small bathroom where you’ll find a bucket of acid. Carry it back to the fountain and pour it in.
Now, you’ll need to find and destroy the remaining evidence. This involves locating 2-3 more evidence boxes (which also contain heads) in the evidence area and 1-2 buckets of acid, usually found upstairs. Be careful when carrying the acid; running or parkouring will cause it to spill, damaging you. Once all the heads and acid have been deposited in the fountain, the evidence will be destroyed.
3. Kill the Witnesses: Return to the main courtroom for another cutscene. You’ll now be tasked with eliminating two witnesses. Head to the door on the left and pick up the microwave trigger to kill the first, contained witness.
For the second witness, you’ll need a tracker. This will lead you to the final two witnesses who are hiding in the courthouse, one in the library and another upstairs. The courthouse will now be teeming with Ex-Pops, so proceed with caution. Once you’ve located and killed both witnesses, it’s time for the grand finale.
4. Execute the Judge: Head back to the main courtroom where the judge has been loaded into an execution device. To power the device, you need to activate two switch boxes in the back rooms of the courtroom. Officer Coyle will be relentlessly hunting you during this phase.
Once the switches are flipped, you must crank the wheels on the execution device to kill the judge. With the judge executed, the trial is complete. All that’s left is to escape to the shuttle.
Secrets and Collectibles
The Secret “Confidential” Room: Like other trials, the Courthouse has a secret room that contains valuable supplies like health and battery boosters, a master key (an infinite-use lockpick), and other useful items. To open it, you need to find and simultaneously press two blue buttons. In solo play, you have a short time to press both. The location of the secret room and its buttons are randomized with each playthrough. Possible spawn locations in the Courthouse include:
- Second Floor: Keep an eye out for the distinctive “Confidential” door on the upper level.
Evidence Files: Throughout the trial, you can find collectible evidence files that reveal more about the lore of The Outlast Trials. Their locations are randomized, so be sure to thoroughly explore every room and corner of the courthouse.
Speedrun Strategies
For those looking to complete the “Courthouse” trial as quickly as possible, here are some tips:
1. Know the Layout: The most crucial element of a successful speedrun is map knowledge. Learn the layout of the courthouse, the possible spawn locations for objectives like the evidence boxes and acid buckets, and the fastest routes between them.
2. Split Objectives (Co-op): In a cooperative playthrough, assign tasks to each team member. For example, have one player search for evidence boxes while another looks for acid. This division of labor will significantly reduce your completion time.
3. Master the Puzzles: Practice the UV light puzzle to solve it quickly. For the code puzzle, if you can’t find all the clues, find three and then quickly cycle through the remaining possibilities.
4. Efficient Witness Elimination: When dealing with the witnesses, you can stun them after triggering the locks on their devices to speed up the process. If they have only one lock left, you can stay close to them as they are locked in their death animation, saving you time.
5. Lure and Evade Coyle: During the final execution sequence, have one player lure Officer Coyle away from the courtroom while the others work on the switches and cranks. This will give you the precious time you need to complete the objective without interruption.
6. Optimize Your Loadout: Consider using the Stun Rig to incapacitate enemies and give yourself breathing room. Amps like Strong Arm (for throwing items further) or Smash (for breaking down doors faster) can also be incredibly useful for a speedrun.
Toy Factory
The Toy Factory is one of Murkoff’s most elaborate and perverse trials. The objective, “Pervert the Futterman,” is a literal and psychological process. You are tasked with taking a human victim, disguised in a creepy Futterman toy mask, and processing him like a product on an assembly line. By systematically coating him in wax and lubricants and ultimately incinerating him, Murkoff aims to shatter your sense of empathy and humanity.
This trial is designed to make you see a person as an object to be manipulated and destroyed, a crucial step in molding you into a detached and obedient sleeper agent. Your primary obstacle in this grim task will be Mother Gooseberry, who roams the factory floors, eager to punish any Reagents slacking on the job.
Walkthrough: Pervert the Futterman
The production quota is high and the work is dangerous. Follow these steps carefully to complete your shift.
1. Infiltrate the Factory and Unlock the Security System: Your first task is to get inside the main factory. The way is blocked by a security door that needs a key. To get it, you must power a nearby trash compactor.
- Find several pieces of trash scattered in the area and place them on the compactor’s conveyor belt.
- Once powered, the compactor will crush a man inside, and you can retrieve the key from the bloody mess.
- Use the key to unlock the security system and enter the production area.
2. Reroute the Production Line (A, B, and C): This is the core of the trial. You must find three specific numbered storage boxes and three corresponding keys to send the victim through three stages of the production line (A, B, and C).
- Find the Keys: All three keys are located on the top floor of the factory. Explore the upper catwalks and control rooms to find them.
- Find the Boxes: The required boxes (e.g., A-XXX, B-923, C-13) are in the storage rooms. Be careful: some boxes are explosive! If a box starts beeping and flashing, drop it immediately and run.
- Process Section A: Find the key for Control Room A and the corresponding “A” box. Place the box on the conveyor belt and use the key to activate the first stage of the production line.
- Process Section B: Follow the victim on the track to section B. Find the key for Control Room B and the “B” box. Place the box on the conveyor and activate the machinery.
- Process Section C: Repeat the process for the final section. Follow the victim, find the “C” key and box, and run him through the last stage of coating.
3. Crank the Lever: After the victim has passed through all three sections, he will stop on the track. Find a nearby lever and crank it to move him toward the incinerator.
4. Burn The “Sex Toy”: The final step is incineration. The incinerator needs its pressure restored before it will work.
- Follow the large pipe leading from the incinerator.
- This will lead you to a storage room where you must find and turn the correct pressure valve.
- The area is heavily patrolled, so be stealthy. Once the valve is turned, the incinerator is active.
- Return to the incinerator and activate it to burn the victim.
With the “product” finished, your job is done. The exit will open, allowing you to flee back to the shuttle.
Secrets and Collectibles
The “Confidential” Room: Like all trials, the Toy Factory has a hidden room containing valuable supplies like boosters and a Master Key. Look for the “Confidential” door and the two blue buttons needed to open it. The location is randomized but keep an eye out in the various storage and maintenance rooms.
Evidence and Syringes: The factory is littered with collectible evidence files and syringes. Search thoroughly in offices, locker rooms, showers, and on shelves to find them. These items provide more lore and can be crucial for survival, especially on higher difficulties.
Speedrun Strategies
To maximize your efficiency and get a top grade, follow these production-boosting tips:
Know the Layout: The factory is a complex space. Learning the locations of the control rooms, key spawns, and storage areas is the most critical factor for a fast run.
Divide and Conquer (Co-op): Split up the work. Have one player search for keys on the top floor while others locate the required boxes in storage. This parallel processing saves immense amounts of time.
Juggle Objectives: Don’t just follow one box from start to finish. Once a box is on the conveyor, immediately start looking for the next key or box. Keep the assembly line moving.Ping for Your Team: When you place a correct (or explosive) box on the conveyor, ping it to let your teammates know what’s coming down the line.
Strategic Distractions: Use throwable items like bottles and bricks to lure Mother Gooseberry and other enemies away from critical objectives, especially during the final valve sequence.
Docks
The Docks trial plunges you into the heart of a Murkoff drug manufacturing operation. The mission, “Poison the Medicine,” is a chilling lesson in societal control. As a Reagent, you are forced to produce and then poison a supply of cocaine. The stated goal is to prove that in a world without faith, “opiates will be the religion of the masses,” and by controlling the supply, Murkoff can kill with the nonchalance of a god.
Overseeing this domain is Franco “Il Bambino” Barbi, a perverse and infantile mafioso. With his sawed-off shotgun, “Lupara,” Franco treats the Docks as his personal fiefdom. He is a new breed of Prime Asset, driven by greed and psychosexual violence, and he will not tolerate any disruption to his business.
Walkthrough: “Poison the Medicine”
This trial is a multi-stage production process. Stay alert and work efficiently to survive.
1. Initial Production Run: Your first task is to get the production line started.
- You’ll begin in a warehouse. Make your way to the drug processing area, marked by a large “cooker.”
- You need to find two bags of “flour” (the drug’s base ingredient) and put them into the cooker. These are usually located near the starting area. You’ll need to pass them through a revolving window to get them into the main processing room.
2. Refill the Cart (The Symbol Decoder Puzzle): The initial supply runs out, and you must find more. The remaining drugs are locked in safes inside train cars, and you need a special decoder to get the codes. This is the most complex part of the trial.
Find the Decoder: Locate the decoder device.
Find the Target Symbol: A TV screen near the train cart will display a symbol (e.g., an eye, a swirl). This is your target.
Locate the Spray-Painted Images: The Docks are covered in fragmented, spray-painted graffiti that matches the target symbol. You must find these fragments. Pro Tip: Keep the decoder out. It will begin to flicker with numbers the closer you are to a relevant piece of graffiti.
Align the Image: Once you find the graffiti, you must find the correct perspective (crouching, standing at a distance, looking from a specific angle) to make the fragmented pieces align into a complete image.
Scan the Code: When the image is perfectly aligned, hold out your decoder and use the alternate-fire button to scan it. The numbers will lock in, revealing the code for one of the safes.
Unlock and Haul: Find the corresponding safe on a train car, enter the code, and retrieve the drug package. Carry it back to the main cart to refill it. Repeat this process until the cart is full. Once full, push the cart back to the main cooker.
3. Poison the Drugs: With the cart full, it’s time to taint the product.
Locate the chemical room, marked with a poison symbol. Inside, you’ll find a chemical canister.
Take the canister to the cooker and pour it in.
This will open a new area: the outdoor Chemical Storage, located near a large boat. You must retrieve several more poison canisters from this area.
WARNING: The Chemical Storage area is filled with toxic gas that will continuously damage you. You must move quickly between pockets of fresh air, which are typically found by opening side doors or going up and down stairs to different levels.
4. Reach the Cargo Hold and Package the Product: Once all the poison has been added, your final task awaits.
- Find the control room near the Cargo Hold sign and press the red button to lower the stairs.
- Proceed down to the Cargo Hold, where you’ll find several corpses.
- Your objective is to grab the newly poisoned drug packages from the cooker and stuff them into the bodies. You need to package at least six.
- Franco is extremely dangerous in this final, confined area. Work quickly and use the environment to evade his shotgun blasts. Once all the drugs are packaged, the exit will open.
Secrets and Collectibles
The “Confidential” Room: The Docks has a secret supply room. To open the “Confidential” door, you and a teammate must press two blue buttons simultaneously (or within a short time frame in solo play). The location is random, so keep your eyes peeled in the various warehouses and storage areas.
Classified Task: Duck Hunt: Hidden throughout the “Poison the Medicine” trial are 10 small, yellow rubber ducks. Finding and “pinging” all of them completes a secret task and unlocks a trophy for your cell. Their locations include:
- Under the starting bridge/pier.
- Under the stairs near the Chem Co. laboratory entrance.
- Floating in a toilet in the Chem Co. men’s room.
- Behind a metal fence near the main boat.
- In a sewer pipe near the drug cart track.
- In the water at the back of the main boat.
Evidence Files: As always, collectible evidence files are scattered throughout the level, offering more lore. Search offices, shelves, and hidden corners to find them.
Speedrun Strategies
To get this job done fast, you need to be ruthless and efficient.
Master the Decoder: The symbol puzzle is the biggest time sink. The fastest way to solve it is to have your decoder out at all times. As soon as it starts flickering, you know a symbol is nearby. In co-op, have one player dedicated to finding and aligning the symbols while others move drugs or distract Franco.
Memorize Codes: Instead of running to a safe after decoding each symbol, find all the codes first. Write them down or memorize them, then unlock all the safes in one go.
Juggling Objectives: Be efficient. While one drug package is being processed, be on your way to find the next. When fetching poison, have one player ferry canisters while another distracts Franco.
Franco Management: Franco’s shotgun has a long range. Use hard cover and break line of sight often. In the final cargo hold, use the bodies and containers to block his shots while you package the drugs.
Chemical Storage Route: Before grabbing a poison canister, quickly scout a safe route with fresh air access. Don’t get caught in the gas with no way out.
Downtown
The “Pleasure the Prosecutor” trial is a depraved theatrical performance orchestrated by Murkoff to teach a simple, brutal lesson: he who controls what justice desires defines the law. Set within a twisted cabaret and the surrounding urban decay, this trial forces you to cater to the debased whims of a powerful figure. Your goal is to turn this theater of perversion against its own master.
This is the domain of Franco “Il Bambino” Barbi, the infantile mafioso who sees this city block as his personal stage. You will be locating and positioning “prostitute” mannequins to “entertain” the prosecutor, culminating in a gruesome and spectacular execution. The entire ordeal is designed to erode your morality, proving that even the highest pillars of society can be brought low by exploiting their darkest appetites.
Walkthrough: “Pleasure the Prosecutor”
The show is about to begin. Don’t miss your cues.
1. Find the VIP Ticket and Enter the Theater: Your first objective is to gain entry to the main theater. The front door is locked, and you’ll need to find a VIP ticket. Search the surrounding buildings, such as the motel or fire station, to locate the ticket. Once you have it, you can enter the theater and begin the main performance.
2. Gather and Position the Mannequins (The Lockdown): This is the core mechanic of the trial. You must locate four “witness” mannequins and bring them to specific, marked locations throughout the Downtown map (e.g., the Diner, the Bank, the Irish Pub).
Dispose of Old Mannequins: First, you’ll need to throw away the “used” mannequins already on stage in the theater.
The Lockdown: Once you place a fresh mannequin in its designated spot, a lockdown sequence will initiate. You must remain within the highlighted area while a percentage meter fills. Leaving the area will halt all progress.
Flip the Levers: The meter will periodically stop (usually around 30% and 60%). To resume progress, you must find and flip a single, randomly chosen lever in the area, which will be flashing red and beeping. You can follow the thick cables running from the central objective to find the correct lever more easily.
Survive the Onslaught: During each lockdown, you will be relentlessly attacked by Franco and numerous Ex-Pops. Survive by hiding, using distractions, and flipping the required levers as quickly as possible. Repeat this process for all four mannequins.
3. The Grand Finale: Execute the Prosecutor (Simon Says): After all four mannequins are in place, you will be called back to the theater for the final act. The Prosecutor will be strapped to a chair on stage, surrounded by colored lights.
This is a “Simon Says” style puzzle. The stage will flash a sequence of colors (e.g., RED, BLUE, BLUE, YELLOW). You must then press the buttons corresponding to those colors in the exact same order.
Successfully completing the sequences will trigger the gruesome execution of the Prosecutor.
Once the prosecutor is dead, the trial is complete. Make your way to the exit shuttle to escape.
Secrets and Collectibles
The “Confidential” Room: Downtown is home to several potential spawn locations for the secret supply room. Finding and opening it with the two blue buttons can provide a massive advantage. Look for the “Confidential” door in these areas:
- The second floor of the main theater.
- The second floor of the motel (often the first door on the right).
- The small building located between the motel and the fire station.
- Inside the donut shop.
- On an upper walkway near a red car, which allows you to drop down into a dressing room.
Classified Task: The Seagulls: Hidden around the Downtown map are several seagulls. Finding and “pinging” all of them will complete a secret task and earn you a unique reward for your cell. Keep your eyes peeled on rooftops, ledges, and other high places.
Evidence Files: As with all trials, collectible documents are hidden throughout the map. Exploring every room, office, and back alley is key to uncovering the full story of Murkoff’s operations.
Speedrun Strategies
To get an A+ and escape quickly, you’ll need to be efficient and ruthless.
Master the Map: Downtown is a complex, multi-level environment. Knowing the fastest routes between the theater and the lockdown locations (Diner, Pub, etc.) is the single most important factor for a fast run.
Divide and Conquer: In co-op, split your team. When a lockdown starts, have one player kite Franco while the others focus on locating the active lever.
Lever Hunting: Don’t wait. The moment the percentage meter stops, your team should immediately follow the cables leading from the objective to find the correct lever.
Simon Says Mastery: For the final puzzle, have one person act as the “caller,” shouting out the color sequence for the others to press. This avoids confusion and errors.
Loadout Optimization: The Stun Rig is excellent for creating space during the hectic lockdowns. The Jammer Rig, new to this trial, can disable traps and give you precious moments of peace. Amps like Smash can help you burst through barricaded doors to create shortcuts.
Suburbs
The “Liquidate the Union” trial is a masterclass in psychological manipulation, designed to turn you against the very idea of organized labor and workers’ rights. Murkoff’s goal is to portray the Union Boss as a corrupt hypocrite, deserving of a brutal and public execution. By forcing you to hunt down and “liquidate” this figure of dissent, they are indoctrinating you to suppress any challenge to corporate authority.
This picturesque suburban setting, with its manicured lawns and charming homes, serves as a deeply unsettling backdrop for the horrors you will commit. The trial also introduces a relentless new threat: The Jaeger, a grotesque and unstoppable Ex-Pop who will hunt a designated Reagent throughout the mission, adding a layer of personal terror to the experience.
Walkthrough: “Liquidate the Union”
Your neighborhood watch duties are as follows.
1. Reach the Town Hall and Find the Union Boss: Your trial begins on the deceptively peaceful streets of the suburb. Your first objective is to make your way to the large mansion that serves as the Union Boss’s headquarters. Once inside, you’ll find that your target has locked himself away in a panic room.
2. Open the Panic Room (The Radio Puzzle): To open the panic room, you must solve a radio puzzle.
A nearby gate will have a sequence of symbols on it (e.g., bunny, moon, heart). This is the code.
You must find several radios scattered throughout the mansion and the surrounding houses.
Each radio has a small, corresponding symbol painted on it (sometimes on the back or side). You must activate the radios in the same order as the symbols displayed on the gate.
Pro Tip: You may need to look through windows or from different rooms to spot the symbols on the radios. Once the correct sequence is entered, the panic room will open.
3. Escort the Union Boss to the Factory: With the Union Boss flushed out, your longest and most dangerous task begins: escorting him from the mansion, through the suburban streets, to a nearby factory for his execution.
The Union Boss moves slowly and must be protected.
The streets are teeming with Ex-Pops, and the Jaeger will be relentlessly hunting one of your team members.
You must clear paths, open gates, and defend the Union Boss from attack. Teamwork is essential here.
4. Drown the Union Boss (The Safety Sign Puzzle): The final stage takes place in the factory’s execution chamber. The Union Boss is placed in a tank, and you must drown him by solving a final, twisted puzzle.
A large screen will display a specific injury (e.g., a bleeding eye, a broken bone).
Around the room are various safety signs depicting protective equipment (e.g., goggles, helmet, gloves).
You must find a projectile (hearts are available in a nearby cold room) and hit the sign that corresponds to the displayed injury. For a bleeding eye, you would hit the sign with the safety goggles.
You must do this correctly three times. Each time, the signs will change their positions.
Once the puzzle is complete, the Union Boss will be drowned, and the trial will end. The exit will open, allowing you to escape the suburbs.
Secrets and Collectibles
The “Confidential” Room: Even suburbs have their secrets. A “Confidential” room with high-tier supplies can be found on this map. Its location is randomized, but search the various houses and the mansion thoroughly for the signature door and its two blue activation buttons.
Classified Task: Let’s Fla-mingle: Hidden throughout the Suburbs are 10 pink lawn flamingos. Finding and “pinging” all of them will complete a secret classified task and unlock a unique trophy for your cell. Check backyards, inside houses, and even in a flaming car.
Known locations include:
- Behind a fence near a red car at the start.
- Inside a flaming car near the rioters.
- In the pump room of the mansion’s swimming pool.
- In the rafters of the mansion’s game room.
- Beside a hedge along the outer rails.
- Inside a house next to a piano.
- In a room behind a fallen mailbox at the final checkpoint area.
Evidence Files: Keep your eyes peeled for collectible documents that shed more light on Murkoff’s twisted worldview. They are hidden on tables, shelves, and in the various buildings across the map.
Speedrun Strategies
To get out of this neighborhood quickly, you’ll need to be efficient.
Map Mastery: The Suburbs map is large and spread out. Knowing the layout of the houses and the fastest routes between the mansion and the factory is critical.
Radio Recon: For the radio puzzle, have your team spread out to find all the radios and their symbols first. Once you know the sequence, one person can quickly activate them in order while the others prepare for the escort.
The Jaeger Kite: Designate one player (ideally not the one being hunted by the Jaeger) to “kite” or distract the majority of enemies during the long escort sequence. This allows the rest of the team to focus on protecting the Union Boss and clearing the path.
Final Puzzle Prep: During the final puzzle, have one player on “heart duty,” constantly grabbing projectiles from the cold room and bringing them to the main chamber. The other players can focus on spotting the injury on the screen and identifying the correct safety sign to hit.
Shopping Mall
The “Kill the Politician” trial is Murkoff’s most cynical lesson yet, designed to prove that in the modern world, politics is just another product to be bought and sold. The trial’s motto is “Vote with your wallet, and show us the freedom you deserve.” You are tasked with disrupting a political rally for a puppet candidate, exposing the rotten core of a system where every citizen has only the rights they can afford.
This grand intersection of American culture and capitalist commerce is the domain of Murkoff’s newest Prime Assets: Otto and Arora Kress. These conjoined twins, heirs to a vast and reckless chemical fortune, are brilliant, sadistic, and codependent lovers. They stalk the halls of their mall, a monument to their belief that power is the ultimate commodity. With Arora’s toxic projectiles and Otto’s brutal chainsaw, they will ensure this political spectacle goes according to their bloody design.
Walkthrough: “Kill the Politician”
Your political activism will require the following steps.
1. Infiltrate the Main Plaza: You begin in the service corridors and back rooms of the mall. Your first objective is to make your way into the main plaza where the political rally is being set up. This will involve navigating through various storefronts and maintenance areas while avoiding the mall’s deadly security.
2. Access the Department Store and Meet the Politician: Once in the plaza, you need to gain access to the large department store. Inside, you will find your target: the Politician, a mannequin who will be the centerpiece of your sabotage.
3. Sabotage the Politician (The Spray Paint Objective): Your main task is to deface the Politician with several cans of spray paint.
Locate the Spray Cans: You must find multiple spray paint cans hidden throughout the different stores and sections of the mall.
Access Different Stores: Many stores will be locked. You will need to complete various small objectives, such as finding keys or restoring power, to gain access to new areas and find all the necessary paint cans.
Spray the Politician: Return to the department store with each can of paint and spray the Politician mannequin. Each time you do, you will draw more attention from the Kress Twins and other enemies.
4. The Execution: After the Politician has been fully defaced, the final phase of the trial begins. The specifics of the execution will be revealed, but it will involve a final, climactic interaction in the main rally area. You must survive the ensuing chaos and complete the execution sequence to pass the trial.
5. Exit the Trial: With the Politician “liquidated” and the rally in ruins, the exit shuttles will be called. Navigate the now chaotic mall one last time to make your escape.
Secrets and Collectibles
The “Confidential” Room: A secret room stocked with high-tier supplies is hidden somewhere within the mall’s many storefronts and back rooms. Look for the “Confidential” door and the two blue buttons required to open it. A thorough search can grant you a significant advantage.
New Classified Task: With every new trial environment comes a new set of hidden collectibles for a classified task. While the specific item for the Shopping Mall is yet to be fully documented by the community, keep your eyes peeled for out-of-place objects. Search high and low in every store, from the food court to the electronics shop, to be the first to uncover this new secret.
Evidence Files: The mall is littered with receipts, memos, and reports that serve as Murkoff’s evidence files. Finding them will reveal more about the Kress twins and their corrupt political machinations. Check behind counters, in fitting rooms, and in employee-only areas.
Speedrun Strategies
To get a five-star rating on this shopping trip, you’ll need to move fast.
Master the Layout: The Shopping Mall is a multi-level maze of stores, escalators, and service corridors. Learning the most efficient routes between the main plaza, the department store, and the locations of the spray paint is paramount.
Divide and Conquer: In co-op, assign different stores to each Reagent. Have players search for spray paint and keys in different areas simultaneously to drastically cut down on time.
Beware the 360° Threat: The Kress Twins are a unique threat. Arora can attack from afar with toxic vials that create nausea traps, while Otto closes in with his chainsaw. Because they are conjoined, they have a 360-degree field of vision. Never assume you are safe. Use hard cover like store counters and shelving to break their line of sight.
Bait and Switch: Use one player to bait Otto into a chainsaw lunge, leaving him vulnerable for a few seconds. This creates an opening for other players to grab an objective item or slip past into a new area.
Efficient Sabotage: Don’t make multiple trips if you can avoid it. Have players collect several cans of spray paint before returning to the Politician mannequin to apply them in quick succession.


Post Comment