Left 4 Dead 2 Story Explained | Walkthrough
Story
Left 4 Dead 2, developed by Valve, took the perfect formula of its predecessor and drenched it in the sweltering heat of the American South. At its core, it’s a four-player cooperative shooter where you and your team fight throughgauntlets of infected, but its genius lies in the “AI Director,” a sophisticated system that dynamically changes item placement, enemy spawns, and environmental effects to ensure no two playthroughs are ever the same.
Play Left 4 Dead 2 on Xbox
The Savannah Survivors: A New Crew
Left 4 Dead 2 introduces a new cast of four Survivors, each with a distinct personality that shines through their constant, often hilarious, banter.
- Coach: A high school health teacher and former football coach from Savannah. He’s the de-facto leader, often taking charge with a mix of fatherly concern and tactical advice. He loves his chocolate.
- Ellis: A cheerful, and rather talkative, mechanic from Savannah. He’s the heart of the group, full of wild stories about his buddy Keith and an unshakeable optimism that somehow persists through the apocalypse.
- Rochelle: A low-level associate producer for a local news station. She was in Savannah to cover the very evacuation that our Survivors missed. She’s pragmatic, cool-headed, and often acts as the voice of reason.
- Nick: A cynical, sharp-dressed gambler and con-man. Initially, he’s only out for himself, but slowly and reluctantly, he grows to care for his fellow Survivors. He hates the South and everything in it.
The overarching story is a desperate journey north. Starting in Savannah, Georgia, the group hears whispers of a functioning military safe zone in New Orleans, Louisiana. Their entire journey is a multi-campaign trek to reach this final bastion of hope.
Campaign Deep Dive: “Dead Center” (The Beginning)
This is where it all begins. “Dead Center” is the first campaign and sets the tone for the entire game.
The Story: Our four Survivors have just fought their way to the top of a hotel in Savannah, only to watch the last CEDA (Civil Emergency and Defense Agency) evacuation helicopter fly away without them. Stranded and despondent, they spot a CEDA sign advertising a second evacuation point: the Liberty Mall. Their goal is simple and desperate: get from the hotel roof to the mall and find a way out.
Walkthrough & Strategy:
- Chapter 1: The Hotel: You start on the roof. Your immediate goal is to get to street level. This chapter introduces the Spitter, a Special Infected whose acid pools can deny areas and shred health.
- Key Challenge: The hotel is on fire. You must navigate down through smoke-filled floors. The fire itself is a hazard, and the tight corridors are perfect ambush spots for Jockeys and Hunters. Stick together and have one person watch the rear.
- Chapter 2: The Streets: Now on the street, the mall is in sight but out of reach. This chapter introduces the first “uncommon common” infected: CEDA agents in hazmat suits, who are immune to fire.
- Key Challenge: You’ll come across Whitaker’s Gun Shop. Whitaker, the owner, has barricaded the road but will lower it for a price: a six-pack of cola from the nearby Save 4 Less grocery store. This is your first “errand” crescendo event. One player must grab the cola and run back to the gun shop’s pneumatic tube, while the others provide covering fire against a relentless horde.
- Chapter 3: The Mall: You’ve made it inside the mall atrium. The finale of this campaign introduces the “Scavenge” mechanic. The only way out is a stock car on display, but it needs fuel.
- Finale Strategy: This is a pure Scavenge Finale. The area is littered with gas cans. The team must work together to grab the cans and pour them into the stock car. Each time a can is picked up, a horde is triggered. The key is coordination: have two players run for cans while two players defend the car. Once the car is full, everyone piles in, and you blast your way out of the mall.
Secrets & Easter Eggs:
- Moustachio: In the Save 4 Less, you can find standees for a snack called “Moustachios.” Punching one will sometimes elicit a unique line from the Survivors.
- Jimmy Gibbs Jr.: The stock car belongs to a fictional legendary driver, Jimmy Gibbs Jr. You can find merchandise and posters of him throughout the mall. Killing a lot of zombies with the car in the finale can unlock an achievement.
Best deals and game discounts
Campaign Deep Dive: “The Passing” (The Crossover)
This DLC campaign is a fan-favorite, serving as a bridge between the two Left 4 Dead games. It takes place between “Dead Center” and “Dark Carnival.”
The Story: Having escaped the mall, the L4D2 Survivors arrive in the small town of Rayford, Georgia, only to find their path blocked by a raised bridge. From the other side, they are greeted by three familiar faces: Zoey, Louis, and Francis, the Survivors from the original Left 4 Dead. They agree to help lower the bridge, but they can’t cross over to help directly. This campaign is poignantly marked by the absence of the fourth original Survivor, Bill, whose fate becomes a central theme.
Walkthrough & Strategy:
- Chapter 1: The Riverbank: Your goal is to make contact with the original Survivors and find a path to the generator that powers the bridge. This chapter introduces the Fallen Survivor, an uncommon common infected who was once a member of another group. Killing them makes them drop supplies like medkits or pills.
- Key Challenge: You’ll pass through a wedding reception with a witch standing right at the altar. You can try to sneak past or coordinate to take her down quickly. The original Survivors will offer commentary and cover fire from across the river.
- Chapter 2: The Underground: The path forward is through a historic “Underground Tour” sewer system. It’s a dark, claustrophobic maze.
- Key Challenge: The tight corners are deadly. Chargers and Spitters are exceptionally dangerous here. The lack of open space means an acid pool can block the entire path. Move slowly, check corners, and listen for audio cues.
- Chapter 3: The Port: You emerge from the sewers into the port where the generator is located. This is the finale.
- Finale Strategy: This is another Scavenge Finale, and one of the most intense in the game. You must collect gas cans to fuel the generator to lower the bridge. The cans are spread out across a street and inside buildings, all while the original Survivors provide cover fire from their vantage point. The finale is a frantic ballet of running for gas, fighting off the horde and multiple Tanks, and a final mad dash back across the lowered bridge to safety.
Secrets & The Crossover:
- Bill’s Sacrifice: The most powerful secret. Near the generator in the finale, you can find the body of Bill, the fourth original Survivor. He is lying dead, having sacrificed himself to save his friends. Interacting with his body prompts somber lines from both sets of Survivors.
- The L4D1 Survivors: Take time to listen to them. They will offer advice and have conversations with the L4D2 crew, filling in details about their own journey.
- Jukebox: In the bar near the start, you can find a jukebox. Playing it will play songs from the fictional band, The Midnight Riders, but will also trigger a small horde.
- Wall Scribbles: As always, the safehouse walls are full of lore. The first safehouse in “The Passing” is covered in messages from Zoey, lamenting Bill’s death and her feelings for him.
Campaign Deep Dive: “Swamp Fever”
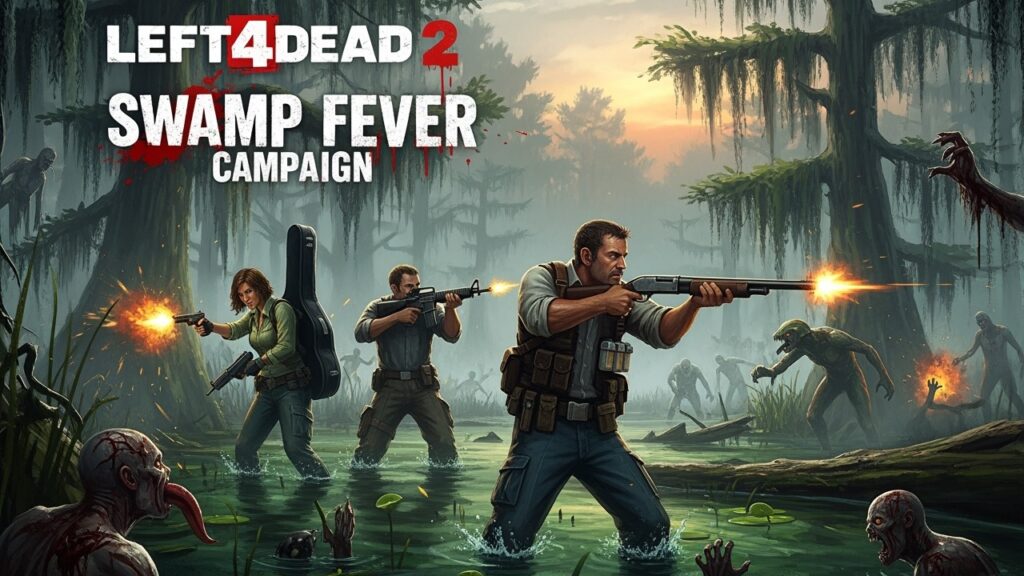
Following their pyrotechnic escape from the “Dark Carnival,” the Survivors’ helicopter pilot is unfortunately bitten and begins to turn. Nick is forced to kill him, and the chopper crash-lands in the bayou. Miraculously, all four Survivors emerge from the wreckage alive, but they are now stranded deep in a swamp, miles from civilization.
Their only hope is to follow the river, guided by signs pointing towards a remote plantation house where, rumour has it, a man named Virgil is operating a boat and ferrying survivors to safety. The campaign is a grueling trek through this hostile swampland, moving from dilapidated stilt villages to a final, desperate confrontation at the plantation, all in the hopes of catching a ride to New Orleans.
“Swamp Fever” introduces unique challenges that are central to its identity.
- The Water: Large sections of every map are covered in water, which significantly slows your movement. This makes you an easy target for Special Infected, especially Spitters, Jockeys, and Chargers. Moving as a group and providing cover is more critical here than in any other campaign.
- Mudmen: This campaign introduces a new “uncommon common” infected. Covered in mud, these swamp dwellers crawl on all fours and move quickly through the water. When they hit you, they spatter your screen with mud, temporarily blinding you. They are hard to see and can quickly disorient an entire team.
- Limited Sightlines: The dense foliage, fog, and murky water create an incredibly claustrophobic atmosphere. Ambushes are frequent, and spotting Special Infected from a distance is nearly impossible. Sound cues are your best friend here.
Walkthrough: Navigating the Bayou
“Swamp Fever” is a four-chapter campaign that progressively moves from the wild swamp to a semblance of civilization.
- Chapter 1: Plank Country: You begin at the helicopter crash site. Your goal is to reach a ferry that can take you across a large body of water.
- The Ferry Finale. This is the first major crescendo event. To summon the ferry, you must press a call button, which triggers a continuous horde attack. The ferry is slow, and you must defend a small, exposed patch of high ground until it arrives. Once it docks, another button must be pressed on the ferry itself to lower the ramp, prolonging the fight. The key is to conserve throwables and medkits for this defense. Setting up on the roof of the nearby shack provides a decent defensive position.
- Chapter 2: The Swamp: After the ferry ride, you’re deposited deeper into the bayou. This chapter is a pure navigation challenge.
- This is the most water-heavy chapter. You will be slow, and you will be exposed. The path is confusing, and it’s easy to get lost. Stick together and look for the rare patches of dry land to make a stand. This is where the Mudmen are most prevalent. Keep your ears open and your head on a swivel. There is no major crescendo event here; survival is the event.
- Chapter 3: The Shanty Town: You emerge from the wilderness into a rickety village of shacks built on stilts over the water. This chapter is all about verticality and precarious pathways.
- Navigating the labyrinthine network of wooden walkways is treacherous. A Charger can send an entire team plummeting into the water below, separating you and making you easy pickings. The chapter culminates in a “gauntlet” event where you must run through a flooded warehouse after activating a generator, triggering a horde with very little room to maneuver. Speed and teamwork are essential to get through the door before you are overwhelmed.
- Chapter 4: The Plantation: You’ve finally made it. In the distance, you can see a beautiful, colonial-era plantation house. This is where Virgil and his boat are supposed to be.
- This is a classic “Holdout” Finale. Upon reaching the house, you use a radio to contact Virgil. He’s on his way, but it will take time. You must defend the two-story plantation house against a massive, multi-wave assault, including at least two Tanks. The best strategy is to hole up on the second floor. Barricade one of the two staircases with gas cans (to shoot when a Tank arrives) and focus your fire on the other. When Virgil signals his arrival with the boat’s horn, you must make a mad dash out the back, through the garden maze, and to the docks to make your escape.
Secrets of the Swamp
While not as filled with interactive secrets as other campaigns, “Swamp Fever” has its own unique points of interest.
- Virgil’s Story: Throughout the campaign, safehouse walls contain messages from other survivor groups, all talking about the legend of Virgil and his boat. These scribbles build the narrative and give your final objective a sense of hope and urgency. You are following in the footsteps of others who either made it or died trying.
- The Witch Bride: In the second chapter, it’s possible to find a Witch crying in the remnants of a small outdoor chapel, still dressed in a tattered wedding gown. This is a subtle environmental storytelling nod, similar to the crying bride in “The Passing.”
- The Fallen Survivor: Though not exclusive to this campaign, the Fallen Survivor (a former survivor carrying supplies) can be found here. Given the difficulty and attrition rate of “Swamp Fever,” finding one can be the difference between life and death.
- Gator Awareness: While there are no actual alligator enemies in the game, the setting is thick with their presence. You’ll see warning signs and hear sounds, all designed by Valve’s AI Director to keep you on edge and constantly questioning what’s in the water with you.
The Parish Campaign
Setting: New Orleans, Louisiana
Chronology: This is the final campaign in Left 4 Dead 2, taking place immediately after the events of Swamp Fever and Hard Rain. The survivors, Coach, Ellis, Rochelle, and Nick, are now close to a military evacuation point.
The survivors arrive at the West Bank of New Orleans after traveling through rural Louisiana, swamps, and a sugar mill. Their goal: reach the Crescent City Bridge, where the U.S. military is airlifting survivors out.
However, the infection has spread so rapidly that much of the military has already withdrawn. The few soldiers left are holding positions to escort evacuees, but they are preparing to bomb the bridge to prevent the infected from crossing into the safe zones.
Campaign Progression & Story Beats
- Waterfront – The Last Push
- The survivors land in a military-controlled zone but quickly realize the path to the bridge is filled with infected.
- Their mission becomes clear: fight through the city streets and reach the bridge before it’s destroyed.
- Streets of New Orleans
- The survivors pass through abandoned streets filled with stalled cars, ruined buildings, and military barricades.
- Signs of desperate evacuation attempts, leftover supplies, burned vehicles, tell the story of chaos and rapid collapse.
- The Cemetery & Courtyard
- The group navigates through a graveyard and church area, a symbolic reminder of the death toll.
- The infected density increases, and Special Infected ambushes become more frequent.
- Military Outpost
- The survivors find a forward operating base. A radio communication with a soldier reveals the plan to bomb the bridge.
- The soldier agrees to hold fire if the survivors can cross quickly, but time is short.
- The Bridge Finale
- The survivors start on one end of the Crescent City Bridge with infected swarming behind them.
- The bridge is a gauntlet of crashed cars, buses, and gaps, forcing constant forward movement.
- At the far end, a military helicopter waits on a pad, but it will leave quickly if the survivors delay.
The Sacrifice Campaign
Setting: Port city in the southern U.S. (canonically after The Passing).
Playable Survivors: Bill, Zoey, Louis, and Francis (Left 4 Dead 1 survivors).
Timeline: After The Passing events where the L4D1 survivors meet Coach, Ellis, Rochelle, and Nick.
Narrative Context:
After helping the L4D2 survivors in The Passing, Bill, Zoey, Louis, and Francis still need fuel for their boat, the Virgil. They head toward a dockside industrial area where a working generator can power a bridge to get them across the water. However, as with all things in this zombie apocalypse, nothing goes as planned.
Chapter 1: The Docks
Objective: Fight from the fishing pier through warehouses and industrial buildings to reach the safe room closer to the bridge area.
Key Points:
- Start in an open dockyard, be alert for Smokers and Hunters that can pull you into the water or behind crates.
- Explore side buildings for better weapons early on; an M16 or SPAS-12 makes later waves easier.
- The open areas make Tanks dangerous, use explosive barrels and maintain line of sight.
- End goal: navigate through cranes, stacked containers, and a boathouse to reach the safe room.
Chapter 2: Barges
Objective: Cross a barge yard and industrial channels to get closer to the generator site.
Key Points:
- Expect close-quarters combat in barge interiors, ideal for shotguns.
- This area often spawns Witches near tight choke points; avoid shining your light.
- The event here may require lowering a ramp or moving a crane to progress, prepare for a horde trigger.
- Final section is a series of catwalks and docks leading into the next safe room.
Chapter 3: Port Finale : The Sacrifice
Objective: Lower the bridge by fueling and maintaining the generator, then escape.
Finale Mechanics:
- Fuel the Generator – Collect fuel cans scattered around the area to start the generator and lower the bridge.
- Defend Against Waves – The infected attack in intervals with Tanks mixed in.
- The Generator Stalls – It will stop working mid-battle, requiring a player to manually restart it.
- The Sacrifice Moment – Restarting means exposing yourself to swarms and Tanks, often leading to death.
- In normal play, any player can volunteer.
- In canon, Bill does this, buying time for the others to escape.
Tips for Success:
- Split roles: one or two survivors gather fuel, others defend.
- Save Molotovs for Tanks, space is tight, so fire zones work well.
- Use pipe bombs to divert hordes while fueling.
- On higher difficulties, coordinate generator restarts carefully, restart only when teammates are ready to cover.
Lore & Significance
- Bill’s Death: Marks one of the few permanent survivor losses in Left 4 Dead lore.
- The Passing Connection: This campaign serves as a prequel to The Passing, explaining why the L4D1 survivors aren’t all present when they meet the L4D2 crew.
- Replayability: Unique because of the player-choice sacrifice mechanic, multiple endings are possible in gameplay, though only one is canon.
No Mercy Campaign
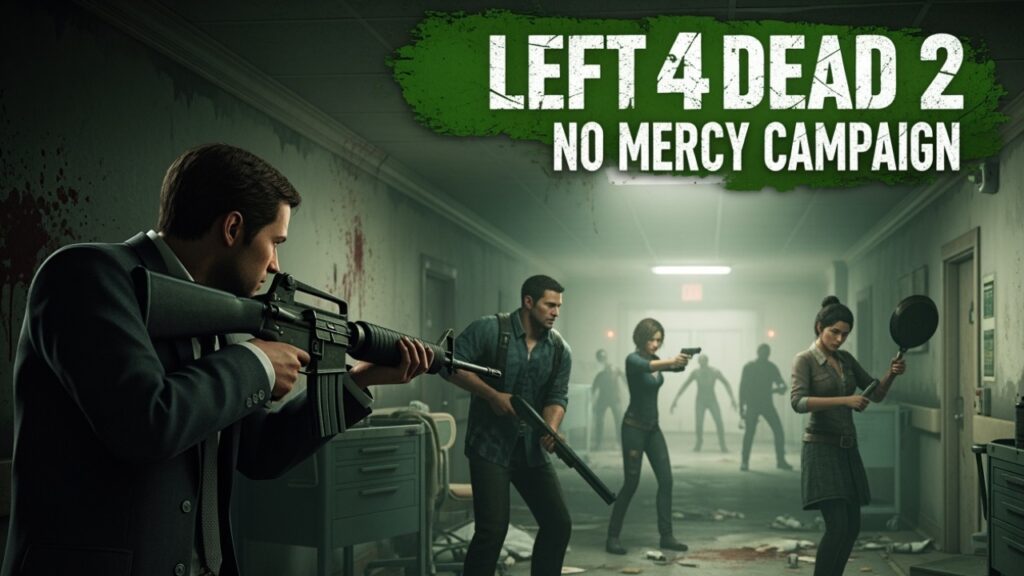
The campaign begins in the city of Fairfield, Pennsylvania, two weeks after the initial outbreak of the “Green Flu.” Our four Survivors, Bill, the grizzled Vietnam veteran; Zoey, the horror movie-loving college student; Louis, the optimistic IT systems analyst; and Francis, the cynical biker who hates everything, find themselves on an apartment building rooftop. The city below is a warzone.
Their objective is born from a single, flickering hope: news broadcasts and military messages have designated Mercy Hospital as a primary evacuation point for civilians. A chopper is supposedly landing on the roof. The entire campaign is this simple, desperate goal: get from this abandoned apartment to the roof of Mercy Hospital, no matter what it takes.
A Chapter-by-Chapter Descent into Chaos
“No Mercy” is a five-chapter masterpiece of environmental storytelling and escalating intensity.
- Chapter 1: The Apartments: You start high above the chaos. The goal is to get to the streets. This chapter is a labyrinth of tight corridors, trashed apartments, and stairwells. It teaches the fundamental rule of Left 4 Dead: stick together. Separating in these tight quarters is a death sentence, making you easy prey for a Smoker’s tongue or a Hunter’s pounce.
- Chapter 2: The Subway: The streets are impassable, forcing the Survivors underground into the city’s subway system. This chapter is defined by its choke points and the constant threat of being pulled onto the electrified tracks.
- Key Challenge: The “crescendo event” here is a classic. You must open a security door to a storeroom to proceed, but it triggers an alarm. This summons a massive horde. The nearby minigun emplacement is your best friend. One player should lay down suppressing fire while the other three watch the flanks.
- Chapter 3: The Sewers: Finding the subway tunnels blocked by a cave-in, the team is forced to descend even further into the filth of the city sewers to find a way around.
- Key Challenge: This is a dark, claustrophobic chapter. The primary crescendo event requires you to call a lift, which then breaks down partway, forcing you to fight your way to a generator to restart it. The main event, however, is at the end: a gasoline tanker blocks the exit. You must shoot it to cause an explosion, which alerts every infected in the area. Finding a defensible spot before you trigger this “gauntlet” event is critical.
- Chapter 4: The Hospital: You emerge from the sewers directly into the Mercy Hospital grounds. You’re close, but the fight is far from over. You must now ascend the building.
- Key Challenge: The elevator. About midway through the hospital, your path is blocked, and the only way up is to call an elevator. This triggers an alarm and a sustained horde attack in a very confined space. You must defend this small area until the elevator arrives. It’s a brutal test of teamwork and resource management.
- Chapter 5: The Rooftop Finale: You’ve made it. The rooftop offers a view of the burning city and a radio connecting to an inbound evacuation chopper. This is the final stand.
- Finale Strategy: This is the blueprint for all Left 4 Dead finales. You use the radio to call for rescue, which alerts a colossal horde. The fight comes in waves, culminating with the arrival of not one, but two Tanks. The key is to find a defensible position, like the small building on the roof, and conserve your best weapons and throwables. When the chopper finally arrives, it will land on the helipad, and you must make a frantic, desperate sprint from your cover to the rescue vehicle. This final run is where countless teams have been wiped out.
Crash Course Campaign
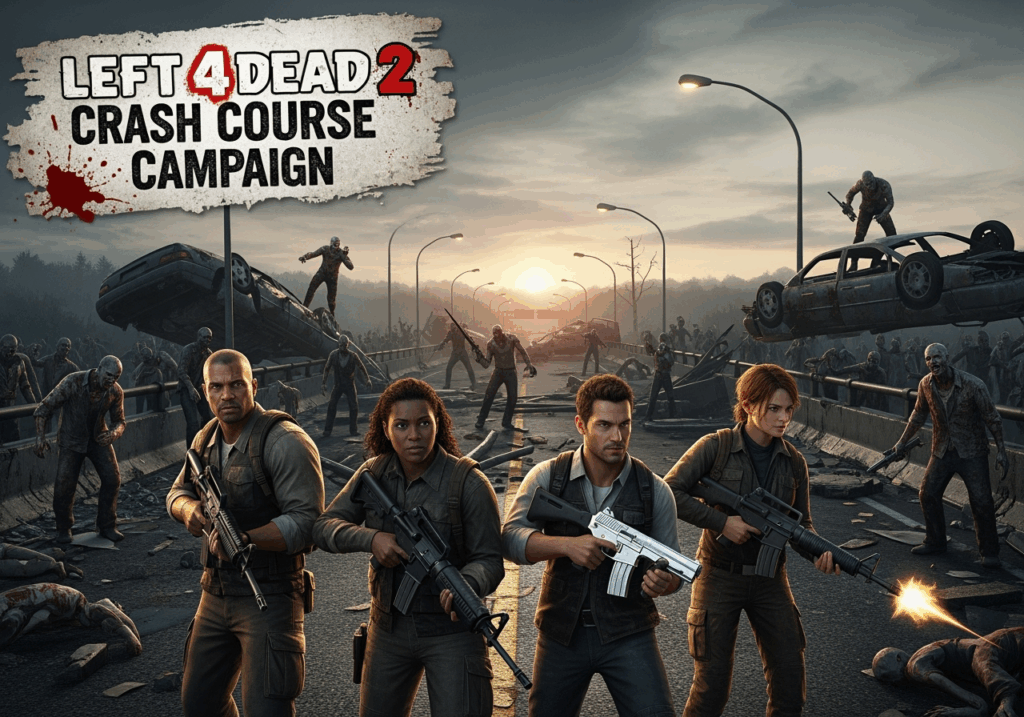
The campaign opens with a cinematic that picks up moments after the “No Mercy” finale. Aboard the helicopter, the Survivors realize their pilot has been bitten. As he turns, Zoey is forced to shoot him. The chopper spirals out of control and crashes into the industrial outskirts of Fairfield.
Dazed but alive, the four crawl from the wreckage. They are now stranded in a new part of the city, filled with tight alleys, warehouses, and a large truck depot. Their new goal is simple: find another vehicle and get the hell out of town before the horde closes in for good.
A Chapter-by-Chapter Gauntlet
“Crash Course” is brutally efficient, packing a ton of action into just two chapters.
- Chapter 1: The Alleys: You begin in a haze next to the flaming wreckage of your chopper. The path forward leads through a series of narrow back alleys and the rooftops of industrial buildings.
- Key Challenge: This chapter is all about close-quarters combat. The tight confines make it incredibly dangerous to get separated. Smokers can pluck Survivors from around corners, and a Boomer exploding in an alley can spell disaster. The main crescendo event involves lowering a bridge to cross a canal. Activating the machinery alerts the horde, forcing you to defend a relatively exposed position until the bridge is down. Team coordination is essential to cover all approach angles.
- Chapter 2: The Truck Depot Finale: After navigating the alleys, you arrive at a large truck depot. Inside the main garage, you find what you’re looking for: a large, armored delivery truck. The only problem is, it’s raised on a lift, and the power is out.
- Finale Strategy: This is a unique, multi-stage finale. First, you must start a generator to restore power. As soon as you do, the noise attracts a massive, continuous horde. While the horde attacks, you must defend the generator and operate the lift controls to slowly lower the truck. The fight is a frantic juggling act. One or two players must focus on keeping the generator running (it can be damaged by infected and shut down), while the others defend the team and the lift controls. Once the truck is fully lowered, a gate opens, and you must make a final sprint to the truck to escape. It’s a grueling endurance test that requires constant communication.
Dead Air Campaign

The narrative of “Dead Air” is a straightforward and compelling dash for freedom. Hearing and seeing aircraft, the Survivors correctly deduce that the airport is their best and perhaps only chance of escaping the state. The entire campaign is a five-chapter gauntlet, forcing them to navigate treacherous urban environments, from apartments and construction sites to the sprawling airport terminal itself, all for a chance to board a plane and fly away from the apocalypse unfolding below.
A Chapter-by-Chapter Flight Plan
“Dead Air” is a masterclass in pacing, with each chapter presenting a unique environmental challenge and memorable set piece.
- Chapter 1: The Greenhouse: The campaign begins on a rooftop, with the Survivors taking in the scope of the city’s destruction. The goal is simple: get to the street. This chapter funnels you through a series of abandoned apartments and a rooftop greenhouse. It’s a classic, close-quarters introduction that forces teamwork and careful corner-checking.
- Chapter 2: The Crane: Upon reaching the street, the path forward is blocked by a raging fire. The only way to proceed is up and over, via a massive construction crane.
- Key Challenge: The Crane Crescendo. This is the campaign’s first major set-piece event. To create a bridge across the inferno, you must activate a construction crane. The deafening noise of the crane’s engine alerts a massive horde. The key to survival is finding a defensible high-ground position before hitting the button, allowing you to rain fire down on the infected as they swarm the area below.
- Chapter 3: The Construction Site: Having crossed the fiery obstacle, the Survivors must navigate through a multi-level construction zone and into a series of interconnected office buildings. This chapter is a maze of concrete and rebar, with significant verticality that Smokers and Hunters can easily exploit. Another alarm-based crescendo event awaits at a security checkpoint, forcing a holdout in a less-than-ideal office space.
- Chapter 4: The Terminal: You’ve finally reached the airport. This chapter is a tense crawl through the eerie, abandoned terminal. You’ll fight through baggage claim areas, security checkpoints, and waiting lounges littered with the luggage of passengers who never made their flights.
- Key Challenge: The Security Shutter Gauntlet. After passing through the metal detectors (which, mercifully, don’t trigger an alarm), you must activate a switch to open a large security shutter. The shutter opens agonizingly slowly, triggering a “gauntlet” style event where you must run and gun through a long, open terminal while a horde attacks from all sides.
- Chapter 5: The Runway Finale: This is it. You emerge onto the tarmac to see a C-130 transport plane, Kilo-Yankee-India 229, being refueled. The pilot is dead, but a voice on the radio confirms the plane is viable. You can escape, but you must survive the refueling process.
- Finale Strategy: This is one of the most iconic and difficult finales in the entire series. When you call for rescue, the refueling truck begins its work, and all hell breaks loose. Unlike other finales with clear “safe spots,” the runway is dangerously open. Infected can swarm from every direction, including from the top of the terminal. The key is to stay mobile, use luggage carts and barriers for cover, and save your most powerful throwables for the two Tanks that will inevitably spawn. Once the refueling is complete, the plane’s ramp lowers, and you must make a final, desperate sprint to safety.
Secrets & Legacy
“Dead Air” is rich with the environmental storytelling that made the series famous. The safe room walls tell stories of other groups who tried, and failed, to make it to the airport. The most iconic secret is a subtle one: if you survive the finale, the plane that takes off is the same plane seen in the background of the main menu for the original Left 4 Dead, a brilliant touch that ties the game’s identity directly to the Survivors’ success.
The campaign’s legacy is its pacing and its phenomenal finale. By denying players a simple “camping spot,” the runway forces a dynamic, chaotic, and ultimately more rewarding fight for survival. It’s a perfect example of Valve’s design philosophy and a true test for any team of Survivors, whether you’re playing it for the first time or revisiting a classic in 2025.
Blood Harvest Campaign
After escaping the airport in a C-130 at the end of “Dead Air,” the Survivors’ hope for a clean getaway is once again shattered. The pilot was infected, and the plane has crashed. Miraculously, they survive, finding themselves stranded in the vast Allegheny National Forest in Pennsylvania.
In the distance, they spot lights from what appears to be an isolated, fortified farmhouse. Hearing rumors of military evacuations from rural outposts, they set their sights on this farm as their next and perhaps final bastion of hope. The entire campaign is a desperate trek through the wilderness to reach this supposed salvation.
A Chapter-by-Chapter Walkthrough
“Blood Harvest” is a five-chapter journey through increasingly difficult and disorienting terrain.
Chapter 1: The Woods
You begin near the wreckage of your plane. This chapter is a pure navigation challenge. The woods are dark, and the dirt paths are confusing and easy to lose. Sticking together is more critical here than ever, as a separated Survivor is a lost Survivor. The goal is to reach a maintenance depot and emergency bunker.
Chapter 2: The Tunnel
The path forward leads through a series of train tunnels and depots. This chapter contrasts the open woods with claustrophobic, pitch-black tunnels. Flares and flashlight discipline are key. A major crescendo event requires you to open a shutter, triggering a horde that you must fight off in a confined warehouse.
Chapter 3: The Bridge
Emerging from the depots, you face a massive, destroyed railway bridge. The only way across is to navigate a perilous, narrow ledge on its side. This is a high-risk chapter where a Charger or even a well-placed Boomer can send the entire team plummeting to their doom. It culminates in a frantic crescendo event where you must cross the bridge while a horde swarms you from behind.
Chapter 4: The Train Station
Having crossed the bridge, you must navigate a massive, abandoned train yard.
- Key Challenge: The Gauntlet. This chapter features a long, open stretch of train tracks where you must run through a series of stationary boxcars. This is a “gauntlet” event, meaning a horde is continuously chasing you. You cannot stop; you must run and gun your way to the safe room at the other end.
Chapter 5: The Farmhouse Finale
You’ve made it. The farmhouse is in sight. You enter the isolated, two-story house to find it empty, but a radio is crackling with the voice of the military. They are on their way.
- Finale Strategy: This is one of the most intense “holdout” finales. You must defend the farmhouse from every conceivable angle. Infected will break through windows, walls, and doors. The surrounding cornfields provide perfect cover for the horde and Special Infected, especially Tanks. The best strategy is to hole up on the second floor, watch the stairs, and keep the windows barricaded as long as possible. When the armored personnel carrier (APC) arrives, you must make a terrifying dash across the open fields to be rescued.
Cold Stream Campaign

The premise is simple. While trekking through the wilderness, the Survivors (Coach, Ellis, Rochelle, and Nick) spot a military rescue helicopter flying overhead. Seeing it follow a nearby creek, they decide their best chance of rescue is to follow the stream upriver to its source, hoping to find the chopper’s landing zone. This simple objective leads them on a treacherous journey through the dense forests and treacherous ravines of the Pacific Northwest.
A Chapter-by-Chapter Walkthrough
“Cold Stream” is a four-chapter campaign famous for its long, punishing crescendo events.
Chapter 1: Alpine Creek
The campaign begins with the Survivors being dropped off by a different helicopter pilot (from the end of “The Parish,” perhaps, in this alternate timeline). The path forward is a winding, downhill trek along the creek bed. This chapter is deceptively calm, lulling you into a false sense of security before its brutal finale.
- Key Challenge: The Cave Gauntlet. To proceed, you must pass through a collapsed tunnel. As soon as you enter, a continuous horde is triggered. You must fight your way through the pitch-black cave, up a ladder, and sprint to the safe room.
Chapter 2: South Pine Stream
This chapter sends you through a larger, more open forest environment with multiple paths. It’s easy to get lost, and the verticality provides perfect ambush opportunities for Special Infected.
- Key Challenge: The Tank in the Water. This chapter often features a Tank spawn in a large, water-filled ravine that slows your movement to a crawl, creating one of the most dangerous combat arenas in the game.
Chapter 3: Memorial Bridge
You emerge from the woods to find your path blocked by a massive bridge. The only way forward is down into the ravine below and up the other side.
- Key Challenge: The Bridge Destruction Gauntlet. This is arguably the most infamous part of the campaign. After you cross under the bridge, you must climb a ladder to a maintenance shed. Hitting a button inside triggers a series of explosions that destroy the bridge, but also alerts an endless horde. You must then run a long, winding path uphill, completely exposed, to the safe room. This gauntlet is exceptionally long and requires perfect teamwork.
Chapter 4: Cut-throat Creek
The final push to the helicopter. This chapter is another grueling uphill battle along the creek.
- Finale Strategy: This is a hybrid Scavenge-Gauntlet Finale. You arrive at a clearing with a radio tower and a helicopter pad. You must collect and pour 8 gas cans into a generator to power the radio. After a brief holdout, the helicopter arrives but is immediately swarmed. You must then fight your way to the chopper through a final, intense wave of infected, including at least one Tank.
Secrets and Legacy
- Community Roots: The biggest “secret” is the campaign’s origin. It wasn’t made by Valve, and it shows. The design philosophy is different, focusing purely on challenge over narrative. This is why you’ll find ammo and supplies in seemingly random locations.
- Brutal by Design: “Cold Stream” is revered in the community as the ultimate test. Beating it on Expert Realism is considered a monumental achievement. Its legacy is one of pure, unadulterated challenge.
Video Walkthroughs
Check out the below playlist on my channel








Post Comment